Imagine a dessert that’s incredibly delicious, simple to make, and requires no baking—sounds like a dream, right? Enter Easy Oreo Truffles, the perfect treat for anyone with a sweet tooth. Whether you’re hosting a party, preparing a festive gift, or simply craving a quick dessert fix, Oreo truffles are a perfect choice. This no-bake dessert combines the irresistible crunch of Oreo cookies with the creamy richness of cream cheese, all encased in a velvety chocolate shell.
But why are these truffles such a hit? For starters, they require minimal ingredients and effort, making them a favorite for both novice cooks and experienced bakers. Their versatility also adds to their charm—you can customize flavors, decorations, and even make healthier versions if you’d like.
In this guide, we’ll walk you through everything you need to know about making Easy Oreo Truffles, from gathering ingredients to mastering variations and storage tips. Ready to dive into the delicious world of Oreo truffles? Let’s get started!
Table of Contents
Why Easy Oreo Truffles Are So Popular
The charm of Easy Oreo Truffles lies in their simplicity and versatility. These truffles are not just another dessert; they are a sensation that delights crowds. Here’s why they’ve become a go-to treat for so many:
1. Minimal Ingredients and Preparation
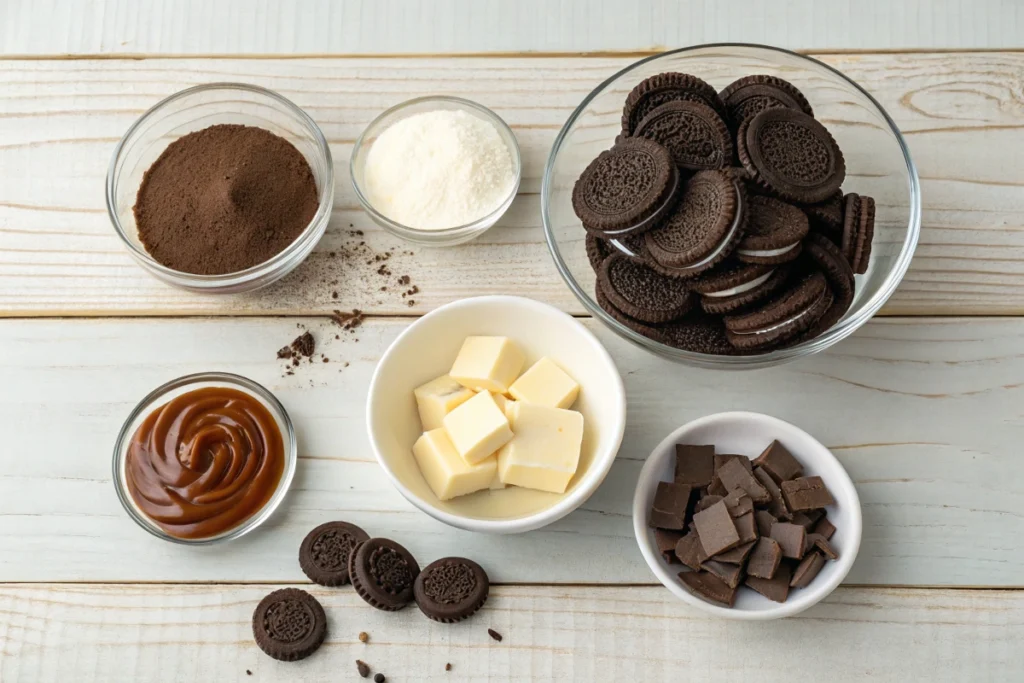
Unlike many desserts that require a pantry full of ingredients, Oreo truffles need only three main components: Oreo cookies, cream cheese, and chocolate. The preparation is just as straightforward, requiring no complicated steps or fancy equipment.
2. Perfect for Any Occasion
From casual family dinners to elaborate celebrations, Oreo truffles fit seamlessly into any setting. They’re small, portable, and easy to serve, making them ideal for parties, potlucks, or even as edible gifts.
3. Endless Customization Options
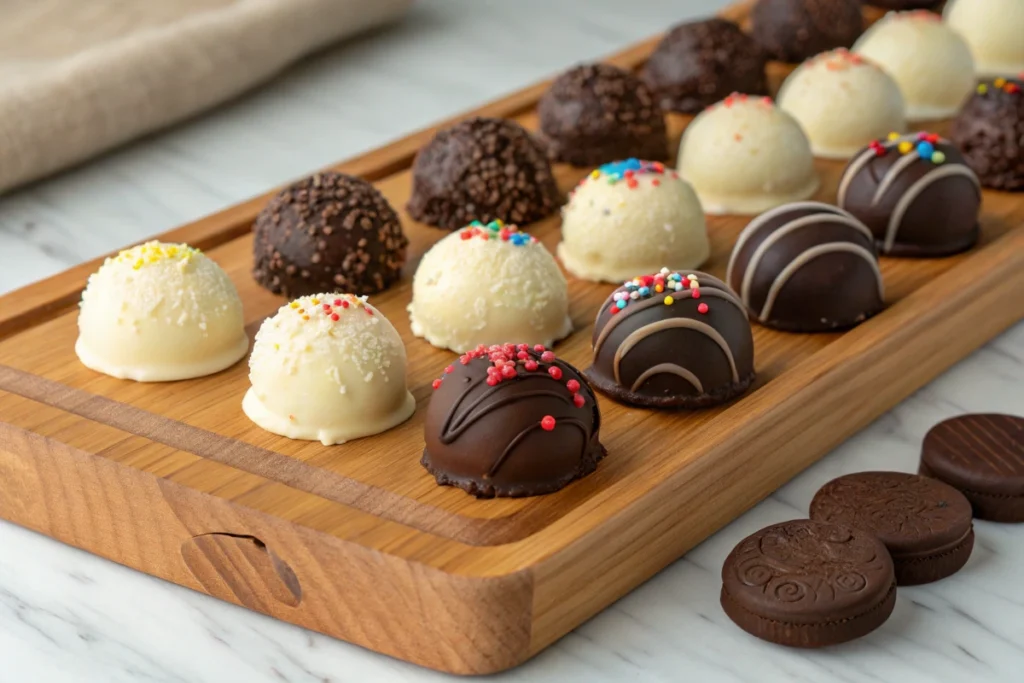
You can make these truffles uniquely yours. Whether it’s adding colorful sprinkles, incorporating different Oreo flavors, or experimenting with coatings like white chocolate or caramel, the possibilities are endless.
4. A Dessert for All Ages
Kids love them for their chocolatey goodness, while adults appreciate their sophisticated presentation. This universal appeal makes Oreo truffles a favorite for all age groups.
Ingredients for Easy Oreo Truffles

Before diving into the process, let’s gather the ingredients. The best part? You probably have most of these items in your pantry already.
1. Essential Ingredients
- Oreo Cookies: The classic original flavor works best, but you can experiment with other varieties like Mint or Golden Oreos for unique flavors. You’ll need about 36 cookies.
- Cream Cheese: Use full-fat cream cheese for a rich and creamy texture. Let it soften at room temperature to ensure smooth blending.
- Chocolate for Coating: Semi-sweet, dark, or white chocolate all work beautifully. Choose high-quality chocolate for the best results.
2. Optional Add-Ons
- Sprinkles or Crushed Nuts: For a decorative and crunchy topping.
- Flavored Extracts: A drop of vanilla or almond extract can add a unique twist.
- Food Coloring: If you’re going for a themed look, mix food coloring into the chocolate coating or filling.
With your ingredients in hand, you’re ready to bring these truffles to life. In the next part, we’ll cover the step-by-step process of making Easy Oreo Truffles, from crushing the cookies to perfecting the decorations.
Step-by-Step Guide to Making Easy Oreo Truffles
Now that you have your ingredients ready, it’s time to dive into the process of making these delicious treats. Follow these simple steps, and you’ll have perfect Oreo truffles in no time.
1: Crushing the Oreos
To start, you’ll need to turn those Oreo cookies into fine crumbs. This step is essential for achieving a smooth and consistent texture for your truffle mixture.
- Method 1: Using a Food Processor
- Place all 36 Oreo cookies in a food processor.
- Blend until the cookies are reduced to fine crumbs.
- Method 2: Manual Crushing
- Put the cookies in a resealable plastic bag.
- Use a rolling pin to crush them into fine crumbs. This method works well if you don’t have a food processor.
2: Mixing the Truffle Dough
- Transfer the crushed Oreos to a large mixing bowl.
- Add 8 ounces of softened cream cheese.
- Mix until the crumbs and cream cheese form a cohesive dough.
- Pro Tip: Use a stand mixer or hand mixer for even blending, but mixing with a spoon works too. The mixture should be thick and sticky.
3: Shaping the Truffles
- Scoop out small portions of the mixture (about 1 tablespoon each).
- Roll them into smooth balls using your hands.
- Place the rolled truffles on a parchment-lined baking sheet.
- Tip: Chill the mixture in the refrigerator for 10–15 minutes before rolling if it’s too soft.
- Once all the truffles are shaped, refrigerate them for at least 30 minutes. This step helps them firm up for easier coating.
4: Coating the Truffles
Now comes the fun part—adding the chocolate coating!
- Melt the chocolate of your choice in a microwave or using a double boiler:
- Microwave Method: Heat in 30-second intervals, stirring after each until smooth.
- Double Boiler Method: Place a heatproof bowl over a pot of simmering water and stir the chocolate until melted.
- Using a fork or dipping tool, submerge each truffle in the melted chocolate, ensuring it’s fully coated.
- Place the coated truffles back on the parchment-lined baking sheet.
- Optional: Add sprinkles, crushed nuts, or a drizzle of contrasting chocolate for decoration before the coating sets.
Step 5: Letting the Coating Set
Allow the truffles to rest until the chocolate hardens. You can speed this up by placing them in the refrigerator for 15–20 minutes.
Bonus Tips for a Perfect Finish
- Prevent Sticking: Lightly coat your hands with nonstick spray when rolling the truffles.
- Smooth Chocolate Coating: Tap off excess chocolate when lifting the truffles out of the melted chocolate.
- Decorative Touch: Use a piping bag to drizzle additional melted chocolate for a professional look.
In the next part, we’ll explore variations of Oreo truffles, serving ideas, and storage tips to keep them fresh.
Variations of Easy Oreo Truffles

One of the best things about Easy Oreo Truffles is their versatility. With a little creativity, you can tailor them to suit any occasion or dietary preference. Here are some exciting variations to try:
1. Seasonal and Themed Variations
- Holiday Truffles:
Use red and green sprinkles or drizzle with colored white chocolate for Christmas. For Halloween, opt for orange and black decorations. - Birthday Cake Truffles:
Add colorful sprinkles to the truffle mixture and use a white chocolate coating for a fun, festive twist. - Valentine’s Day Truffles:
Decorate with pink and red accents, or add a touch of strawberry flavor to the filling.
2. Oreo Flavor Variations
- Mint Oreo Truffles:
Swap the classic Oreos for mint Oreos and coat with dark chocolate for a refreshing flavor. - Golden Oreo Truffles:
Use Golden Oreos for a lighter, vanilla-based flavor profile. - Peanut Butter Oreo Truffles:
Add a tablespoon of peanut butter to the mixture and coat with milk chocolate.
3. Health-Conscious Variations
- Vegan Oreo Truffles:
Use dairy-free cream cheese and vegan chocolate to make these truffles vegan-friendly. Most Oreo varieties are already vegan, so this is an easy swap. - Gluten-Free Oreo Truffles:
Opt for gluten-free Oreo cookies to cater to those with gluten sensitivities. - Low-Calorie Truffles:
Substitute cream cheese with low-fat Greek yogurt or a reduced-fat version to cut down on calories.
4. Decadent Additions
- Cheesecake Oreo Truffles:
Add a splash of vanilla extract and a spoonful of powdered sugar to the mixture for a cheesecake-like flavor. - Nutty Delight:
Roll the truffles in crushed nuts or mix finely chopped nuts into the filling for added crunch. - Boozy Truffles:
Add a tablespoon of Baileys Irish Cream or Kahlúa to the mixture for an adult-friendly treat.
Serving and Storing Your Oreo Truffles

Once your Oreo truffles are ready, you’ll want to present and store them in the best way possible to retain their flavor and appeal.
Creative Ways to Serve
- Dessert Platter:
Arrange the truffles on a decorative tray with other bite-sized desserts for a stunning display. - Gift Packaging:
Place the truffles in mini cupcake liners and pack them in a gift box for a thoughtful and delicious gift. - Party Pops:
Insert small sticks into the truffles before coating them with chocolate to create Oreo truffle pops—perfect for kids’ parties.
Storage Tips
- Short-Term Storage:
Keep the truffles in an airtight container in the refrigerator. They’ll stay fresh for up to one week. - Long-Term Storage:
Freeze the truffles for up to two months. To serve, let them thaw in the refrigerator for a few hours. - Pro Tip:
Store truffles in a single layer to avoid damaging their chocolate coating.
Frequently Asked Questions About Easy Oreo Truffles
Here are some commonly asked questions to ensure your Oreo truffles turn out perfectly every time.
1. Can I use a different type of cookie instead of Oreos?
Absolutely! While Oreos are the classic choice, you can use any cookie with a similar texture, like graham crackers, digestive biscuits, or even chocolate chip cookies for a unique twist. Just make sure to adjust the cream cheese quantity as needed.
2. How do I keep my chocolate coating smooth and glossy?
To achieve a smooth, glossy finish:
- Melt the chocolate slowly using a double boiler or in short intervals in the microwave.
- Add a teaspoon of coconut oil or vegetable shortening to the chocolate for a shinier coating.
- Let the chocolate cool slightly before dipping to prevent clumps or streaks.
3. What if my truffle mixture is too soft to roll?
If your mixture feels too soft or sticky:
- Refrigerate it for 15–30 minutes before rolling.
- Use lightly greased hands to prevent sticking.
4. Can I make Oreo truffles ahead of time?
Yes! Oreo truffles are great for prepping in advance.
- Make and store them in the refrigerator for up to a week.
- For longer storage, freeze them in an airtight container for up to two months.
5. What’s the best chocolate for coating truffles?
High-quality melting chocolate or chocolate chips works best. You can choose semi-sweet, dark, milk, or white chocolate depending on your taste preferences.
6. Can I decorate my truffles after the coating hardens?
Yes! If the chocolate has already set, drizzle additional melted chocolate on top, or use edible glitter or icing to add details.
Conclusion: Why You Should Try Making Easy Oreo Truffles Today
Easy Oreo Truffles provide a refreshing alternative to complex recipes and time-consuming desserts. They’re simple, versatile, and absolutely delicious—a perfect treat for any occasion. Whether you’re crafting them for a party, a gift, or just a sweet indulgence for yourself, these truffles deliver maximum flavor with minimal effort.
From the first bite of the creamy, chocolatey goodness to the satisfying crunch of the coating, Oreo truffles are bound to impress everyone. Plus, with endless customization options, you can truly make them your own.
So, grab a pack of Oreos and some cream cheese, and let your creativity shine. It’s time to whip up a batch of these delectable delights and share the joy of Easy Oreo Truffles with the ones you love!
